Minecraft 1.18 Shaders (How To Install Shader In 1.18)

The new Caves & Cliffs Replace: Half 2 adds two new biomes that you'll find in caves. Minecraftservers don’t look very nice in the event you don’t use mods. That’s why we’re going to show you the most effective Minecraft 1.18 shaders. However, there is all the time confusion and therefore as soon as once more the note that these shaders will not be useful resource packs. Both are utterly different things.
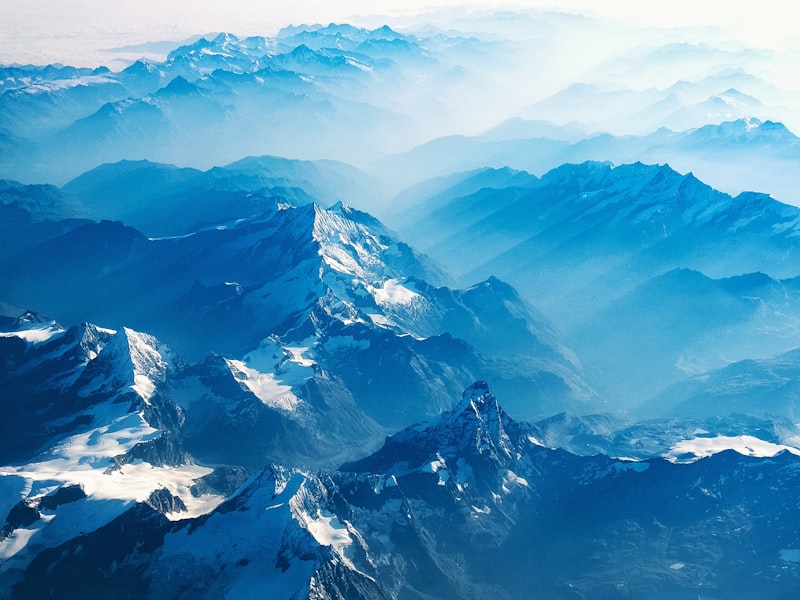
In the course of the checks, we paid attention to the next features:
- Life like water
- Compatibility with low-finish Pc
- Lovely sky with new moon and solar
In a small Q&A session on our Discord server, it was clear that these are crucial issues for the players we requested. Mainly, each Minecraft shader for 1.18 has these options, however some are only ultra-practical and others have an FPS enhance. Subsequently, it is advisable to all the time learn the system requirements in order that your game doesn’t crash.
Best Minecraft Shaders for 1.18
Up to now, these shaders have been the most popular and have tens of millions of downloads on websites similar to Curseforge and Planet Minecraft. They are good if you'd like to improve gameplay with new stuff. This contains lifelike lighting, shifting grass and higher leaves.
You can also select a new texture pack that can further improve your panorama. Packs from the realism category match best, as a result of they partly have PBR and POM textures that harmonize completely with the newest RTX shaders. Nonetheless, you should have a particularly highly effective graphics card when you resolve to go for it.
Furthermore, it's also possible to play on servers with all packs from the listing. This is most enjoyable with friends, and with our accomplice Apex you may get a primary-class Minecraft server for only a few dollars. It is all the time online and even protected towards DDoS assaults.
How to put in 1.18 Shader
First, it's good to download a program that allows you to put in shaders on Laptop. There is no built-in perform from Mojang for this. Over the previous couple of years, Optifine 1.18 has been used by nearly all of the neighborhood for this function. Alternatively, you can download Iris Shaders 1.18 with Sodium if you choose this modpack and need to play shaders with out Optifine. Both obtain the installer file or use Fabric. Those are the only options, because the GLSL shader mod hasn’t been up to date for a very long time. But that’s not a problem, as a result of it was just for Home windows and didn’t assist the Apple operating system macOS.
Install Optifine
Now again to the Java Edition. Open the Optifine .jar file with a double click, if it has the Java file icon. If it doesn’t, then proper click on and select “Java™ Platform SE binary”. If that doesn’t work both, then verify in case you have Java 17 put in in your computer. It is sort of potential that this isn't installed, as a result of this version is supported by Minecraft for the primary time.
The set up wizard will then open. Its design is extremely simple and easy to understand straight away. Click on “Install” and a brand new Optifine installation might be created in the Minecraft launcher. By the best way, these directions work also with the new Minecraft launcher, which combines the Windows Version, Java Edition and Dungeons.
Now open the game and go to the “Installations” tab. Here you'll discover the newly created profile. If the Caves & Cliffs update doesn't crash, then every thing went nicely. At the underside left of the start display screen, you will now additionally see that you are playing with mods.
Add shaders in Minecraft 1.18
There at the moment are many new settings within the choices. However, you're only interested within the shaders feature that you'll find in the video settings. This menu is much like the useful resource packs menu and for installation you also open a folder within the lower left nook. You too can open it manually on your Computer like this: %appdata%.minecraft\shaderpacks.
Clearly, you progress all the Minecraft 1.18 shaders you need into this folder. But before you can put one there, you might have to choose one. It’s greatest to decide on three from our listing where you like the screenshots and video showcases. Additionally, we only record free initiatives, so that you don’t have to fret about hidden prices.
All in all, a couple of tests are certainly mandatory to find the very best 1.18 shader for you. At all times evaluate the FPS, as a result of they are decisive for whether or not it lags, and the aim is at all times to get no lags. That’s it with this tutorial, and that i hope you discovered everything you had been searching for. After all, there is also a similar article for the earlier version, which reveals the most well-liked shader packs for the primary part of the Caves & Cliffs Replace.